#Reverse Balayage: A Modern Hair Color Technique
Reverse balayage is a trendy hair color technique gaining popularity for its soft, natural-looking results. It's a twist on traditional balayage and can be a great way to refresh your look or achieve specific color goals. Let’s dive into everything you need to know!
#1. What is Reverse Balayage? How Does it Work?
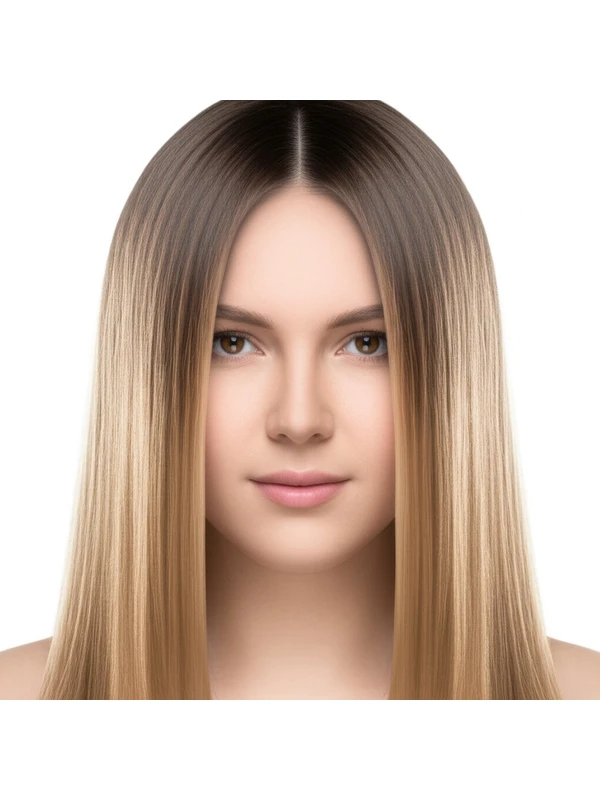
Reverse balayage, unlike traditional balayage where highlights are applied from the roots down, starts at the ends and works upwards towards the scalp. This seemingly small shift creates a unique effect.
Tools & Products:
- Lightener/Color: Your stylist will choose a lightener or color based on your desired level of lightness.
- Developer: A developer activates the lightener; strength depends on hair health and target lift.
- Balayage Brush: A wide, angled brush is essential for precise application.
- Foils (Optional): While primarily a freehand technique, foils can be used in specific areas to control lift or create more intense contrast.
- Gloves: To protect skin and clothing.
Application Process:
- The stylist begins applying the lightener at the ends of your hair.
- They then work upwards, gradually blending the color towards the roots.
- Placement is crucial – it’s often concentrated on the lower sections of the hair to create a brighter overall effect and soften darker roots.
- Timing varies based on desired lift and hair condition; regular checks ensure even processing.
#2. Best Use Cases: What Does Reverse Balayage Achieve?
Reverse balayage is versatile! It’s more than just a pretty technique—it addresses several common hair color goals.
- Dimension & Brightness: Adds brightness and dimension, particularly to the lower layers of your hair.
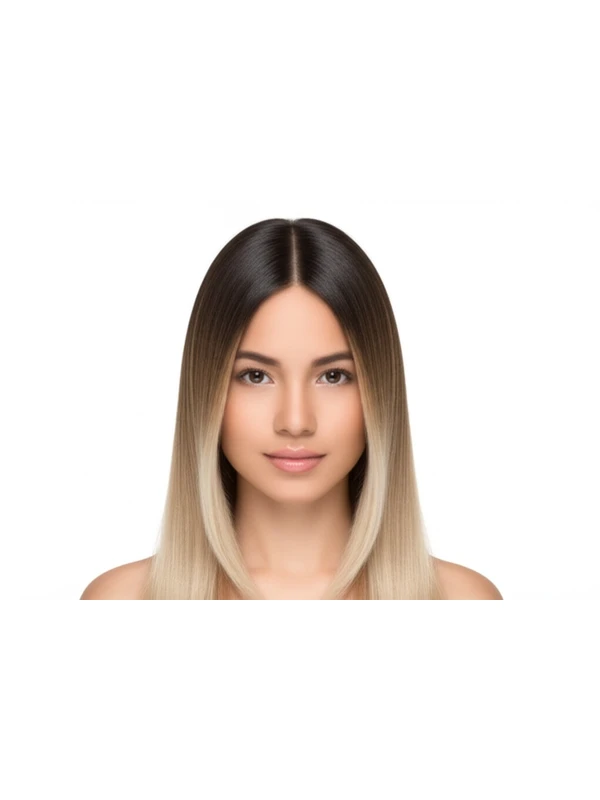
- Root Blur: Creates a softer transition from darker roots to lighter ends, minimizing harsh lines. The gradual blend is key here.
- Face-Framing Highlights: Can be strategically placed around the face for enhanced features and added brightness.
- Subtle Coverage (Gray Blending): While not designed as full gray coverage, it can subtly blend grays within the hair, creating a softer look compared to solid color. It's best paired with strategic placement and consultation.
#3. Who is Reverse Balayage Best For?
This technique isn’t one-size-fits-all. Here's who typically thrives with reverse balayage:
- Natural Color Level: Generally works well on levels 2-6 (light brown to dark blonde). Those with darker starting colors may require multiple sessions for desired lightness.
- Undertones: Suits a variety of undertones, but warm skin tones often benefit from warmer highlights; cool skin tones can look great with cooler tones. Your stylist will assess this during the consultation.
- Hair Type/Texture:
- Straight Hair: Creates beautiful, blended dimension.
- Wavy Hair: Enhances natural waves and adds shine.
- Curly & Coily Hair: Can bring out curl definition and brightness; strategic placement is vital to avoid uneven lift.
- Density: Works on all hair densities – the stylist can adjust the amount of product used accordingly.
- Length: Looks stunning on medium-to-long lengths, but shorter styles can also benefit from a softer, face-framing effect.
- Lifestyle: Ideal for those who want a low-maintenance look with subtle brightness and don’t require frequent salon visits.
#4. Reverse Balayage vs. Similar Techniques
Understanding the differences between hair color techniques helps you articulate your desired outcome to your stylist.
- Balayage (Traditional): Starts at the roots and works down, creating a more gradual lightening effect overall. Reverse balayage focuses on brightening ends first.
- Foilyage: Combines balayage painting with foils for increased lift and control; reverse foilyage would follow similar principles but starting at the ends.
- Highlights: More defined, evenly spaced sections of lightened hair compared to the softer, blended look of balayage/reverse balayage.
- Root Smudge: A technique used after lightening (balayage or highlights) to soften the line between the roots and lighter ends; often paired with reverse balayage for an even more seamless transition.
- Shadow Root: Intentionally leaves a darker root area, creating a gradual fade into brighter lengths – this can be achieved alongside reverse balayage by adjusting placement.
#5. Maintenance & Longevity: Planning Your Refresh Schedule
Proper care and realistic expectations are key to maintaining your reverse balayage look.
- Salon Timing: Expect initial application to take around 2-4 hours, depending on hair length, density, and desired lightness.
- Toner/Gloss Refresh: Every 6-12 weeks (or as needed) to maintain brightness and correct any unwanted tones. This is crucial!
- Grow-Out Behavior: The gradual placement of the highlights means grow-out will be softer than with traditional highlights – less noticeable root lines.
- Budget/Time Planning: Initial application can range from $200-$500+ depending on location and stylist expertise. Toner/gloss refresh appointments are typically 30-60 minutes and cost around $75-$150+.
#6. At-Home Care Tips for Reverse Balayage Hair
Protecting your color investment is essential!
- Wash Cadence: Wash hair less frequently (2-3 times per week) to preserve color vibrancy.
- Heat Protection: Always use a heat protectant spray before using styling tools like blow dryers, straighteners, or curling irons.
- Color-Safe Products: Use shampoos and conditioners specifically formulated for color-treated hair—sulfate-free is best!
- Deep Conditioning Treatments: Regular deep conditioning treatments (weekly or bi-weekly) will help maintain moisture and prevent breakage.
#7. Pros & Cons of Reverse Balayage
Pros:
- Soft, natural-looking results.
- Low-maintenance grow-out.
- Adds dimension and brightness without harsh lines.
- Versatile for various hair types and lengths.
- Can subtly blend gray hairs.
Cons:
- May require multiple sessions on darker hair.
- Not suitable for full gray coverage (needs a base color).
- Requires a skilled stylist to achieve optimal results.
- Potential for damage if not applied correctly or with proper aftercare.
#8. Salon Consultation Script Prompts
Prepare for your consultation by thinking about these questions:
- What is your current hair color level and condition?
- What are your desired lightness goals? (Show inspiration photos!)
- Do you have any concerns about damage or sensitivity?
- How often are you willing to visit the salon for maintenance?
- What’s your budget for this service, including toner/gloss appointments?
- Are there specific areas of face-framing that you desire?
#9. FAQs About Reverse Balayage
- Can I do reverse balayage at home? While possible, it's highly recommended to have a professional stylist perform this technique due to the precision required and potential for damage if not done correctly.
- How long does reverse balayage last? The color itself will fade gradually over several months, but toner/gloss appointments every 6-12 weeks help maintain vibrancy.
- Will reverse balayage damage my hair? Any lightening process can cause some degree of damage. A skilled stylist will assess your hair’s health and use appropriate products and techniques to minimize impact.
- How is this different from traditional balayage? Reverse balayage begins at the ends, while traditional starts at the roots for a more overall brightening effect.
- Can reverse balayage be done on previously colored hair? Yes, but your stylist needs to assess the condition of your hair and any existing color build-up. A test strand may be recommended.
- What if I want a darker root shadow with my reverse balayage? Your stylist can strategically apply less lightener near the roots or use a root smudge technique after lightening for a softer transition.
- How will this look on very fine hair? Reverse balayage can add dimension to finer hair, but too much lightness could make it appear even thinner. Careful placement and product selection are key.
- Can I get highlights with reverse balayage? Absolutely! The stylist can incorporate traditional highlighting techniques alongside the reverse balayage for a more customized look.